How to Make Boom Bap Beats on an MPC: Drums, Swing & Chops (2026)
This article contains affiliate links. If you buy through them, GUIO Records may earn a small commission at no extra cost to you. As an Amazon Associate I earn from qualifying purchases. Outside the US, Amazon links open your local Amazon store (UK, Canada, Germany, France, Italy, Spain, Netherlands, Poland or Sweden).
Most boom bap guides are written for a DAW and stop at “add some swing.” This one is for the MPC, the machine the sound grew up on, and it comes with what those guides leave out: patterns you can read on a 16-step grid, what each swing percentage does in milliseconds, and the exact screens to get there.
How this guide was made: I make boom bap on an MPC Live III, so the workflow comes from use. Button names come from Akai’s MPC 3 user guide (v3.4), and menus can move slightly between software versions. The patterns are starting points I wrote for this guide, not transcriptions of any record. The millisecond figures are my own arithmetic from Roger Linn’s definition of swing, linked at the end.
What is boom bap?
Boom bap is a style of hip hop built on a hard kick (boom) and a sharp snare (bap), usually over chopped samples from old records. The word imitates the drums. T La Rock used it on “It’s Yours” in 1984, though DJ Premier has argued the phrase was already around, and KRS-One made it famous with Return of the Boom Bap in 1993.
The machines shaped the sound. DJ Premier’s classic workflow, as described by Gearnews, went like this: sample from vinyl, process on an Akai S950, then pitch and play the hits from the pads of an MPC60. To hear what that adds up to, read our breakdown of who produced every song on Illmatic or the review of The Low End Theory.
Where to buyAkai MPC Live III
Step 1. Set the tempo and a two-bar sequence
Start a new project and set the tempo around 90 BPM. Published ranges vary: RouteNote’s guide gives 80–105, and other guides narrow it to about 85–95. Treat it as a range, and let the sample decide. If you already have a loop in mind, chop first and set the tempo to whatever makes it feel right.
Keep the sequence at two bars. A one-bar loop gets boring fast, and two bars give you room for a small change at the end without having to think about arrangement yet.
Step 2. Pick a kick, a snare and a hat
This decision matters more than any setting later on. Load one kick, one snare and one closed hat onto pads of a drum track and play them alone. If the snare sounds thin by itself, swap it now, because processing rarely saves it.
- Kick: short and rounded. A long tail gets in the way of the bass.
- Snare: the star of the beat. Listen to where it sits against your sample and change it if they fight.
- Hat: dull and dusty usually beats bright and clean. It should sit behind everything else.
Sounds can come from a kit, from a sound pack or from records. The classic source is the drum break: “Funky Drummer” by James Brown and “Impeach the President” by The Honey Drippers, which Stereogum traces through decades of hip hop, are two of the most used. If you are sampling your own, our guide on how to sample vinyl covers it.
Step 3. Program the boom bap drum pattern
Read these grids left to right, one bar of 16 steps. ● is a hit, ○ is a quiet ghost note and ◉ is an open hat. You can tap them in on the Step Sequencer (Menu › Step Sequencer) or record them live: press Rec, then Play, then use Overdub for each new pad. Akai recommends recording one pad at a time if you are not used to finger drumming.
Pattern 1: the skeleton
Literally boom, bap, boom, bap. This is not a finished beat, but every other pattern here is built on it.
| Step | 1 | 2 | 3 | 4 | 5 | 6 | 7 | 8 | 9 | 10 | 11 | 12 | 13 | 14 | 15 | 16 |
|---|---|---|---|---|---|---|---|---|---|---|---|---|---|---|---|---|
| Count | 1 | e | & | a | 2 | e | & | a | 3 | e | & | a | 4 | e | & | a |
| Hat | ● | ● | ● | ● | ● | ● | ● | ● | ||||||||
| Snare | ● | ● | ||||||||||||||
| Kick | ● | ● |
Pattern 2: the bounce
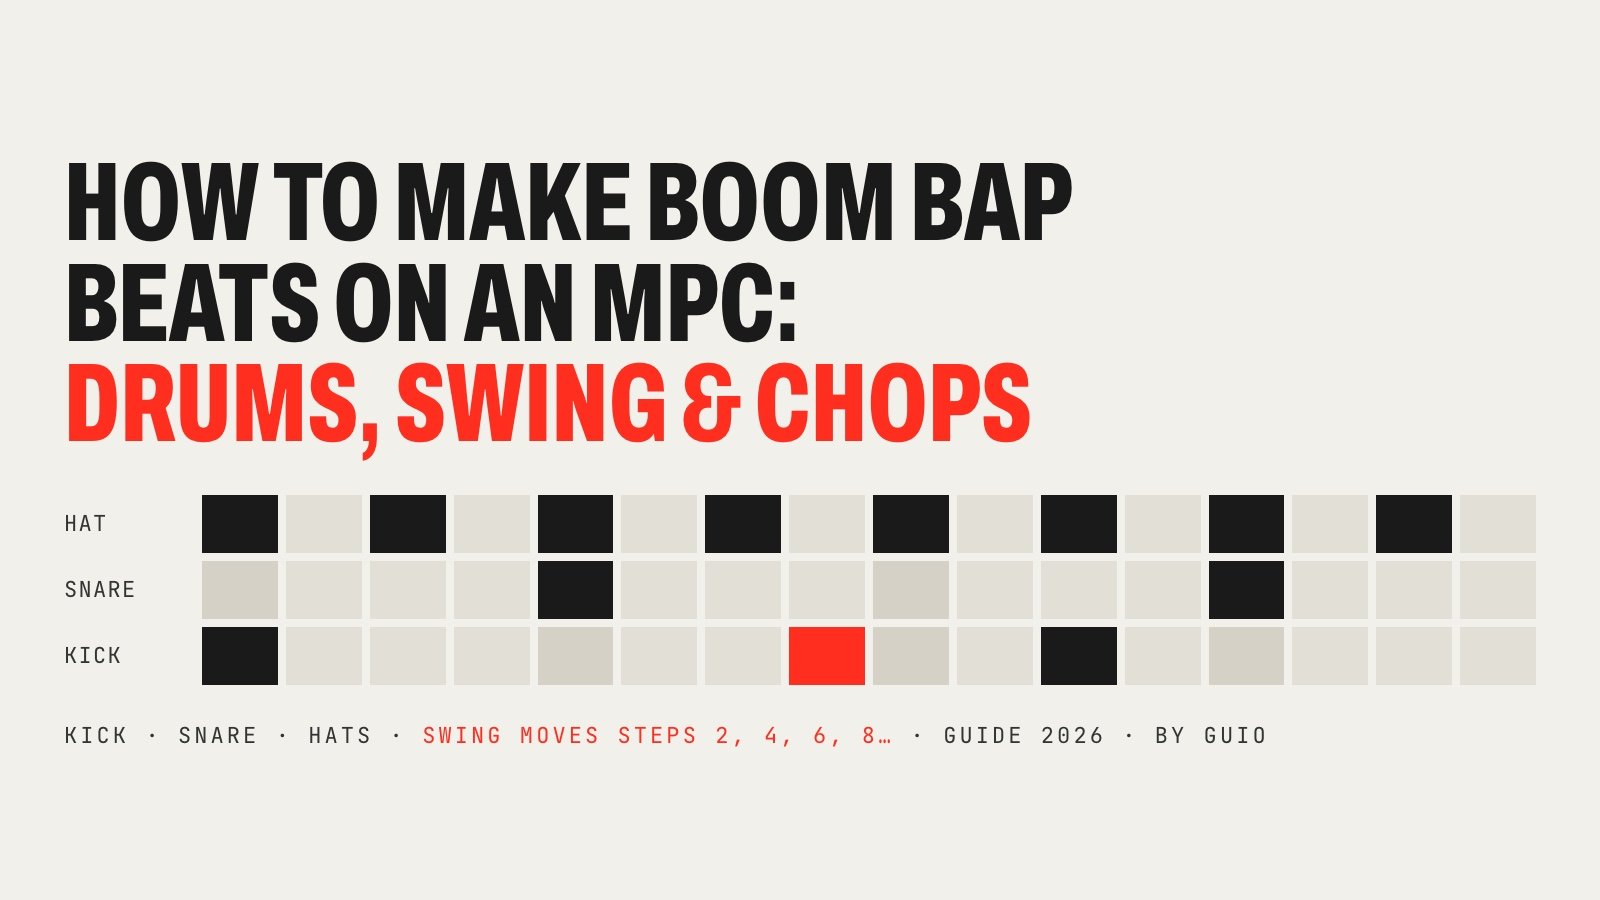
The kick moves off beat 3, onto step 8 (just before the middle of the bar) and step 11. Same snare, and suddenly it nods. Start here if you only try one.
| Step | 1 | 2 | 3 | 4 | 5 | 6 | 7 | 8 | 9 | 10 | 11 | 12 | 13 | 14 | 15 | 16 |
|---|---|---|---|---|---|---|---|---|---|---|---|---|---|---|---|---|
| Count | 1 | e | & | a | 2 | e | & | a | 3 | e | & | a | 4 | e | & | a |
| Hat | ● | ● | ● | ● | ● | ● | ● | ● | ||||||||
| Snare | ● | ● | ||||||||||||||
| Kick | ● | ● | ● |
Pattern 3: ghost notes and 16th hats
A soft snare on step 10 and a kick on step 16 that leans into the next bar. The hats go to 16ths, with the even steps quiet, which is what gives swing the most to work with.
| Step | 1 | 2 | 3 | 4 | 5 | 6 | 7 | 8 | 9 | 10 | 11 | 12 | 13 | 14 | 15 | 16 |
|---|---|---|---|---|---|---|---|---|---|---|---|---|---|---|---|---|
| Count | 1 | e | & | a | 2 | e | & | a | 3 | e | & | a | 4 | e | & | a |
| Hat | ● | ○ | ● | ○ | ● | ○ | ● | ○ | ● | ○ | ● | ○ | ● | ○ | ● | ○ |
| Snare | ● | ○ | ● | |||||||||||||
| Kick | ● | ● | ● | ● |
Pattern 4: the turnaround (bar 2)
Use Pattern 2 as bar 1 and this as bar 2. The extra kick on step 14 and the open hat on step 15 tell the listener the loop is about to come around. Put the open and closed hats in the same Mute Group so one cuts the other, which is the trick Akai’s manual suggests for realistic hats.
| Step | 1 | 2 | 3 | 4 | 5 | 6 | 7 | 8 | 9 | 10 | 11 | 12 | 13 | 14 | 15 | 16 |
|---|---|---|---|---|---|---|---|---|---|---|---|---|---|---|---|---|
| Count | 1 | e | & | a | 2 | e | & | a | 3 | e | & | a | 4 | e | & | a |
| Hat | ● | ● | ● | ● | ● | ● | ● | ◉ | ||||||||
| Snare | ● | ● | ||||||||||||||
| Kick | ● | ● | ● | ● |

Step 4. Add the hats with dynamics
Hats at one fixed velocity are the fastest way to sound programmed. The usual fix is simple: louder on the beat, softer on the steps in between, and a little variation from bar to bar. As a starting point:
| Hit | Velocity to start with | Why |
|---|---|---|
| Kick, snare | 110–127 | The backbone. Keep them consistent |
| Hat on the beat | 90–105 | Marks the pulse |
| Hat between beats | 55–80 | Moves the groove without crowding it |
| Ghost snare or kick | 35–60 | Felt more than heard |
These numbers are my starting points, not a rule, and they depend on your pad curve and sample. For exact values, 16 Levels spreads one sound across 16 pads by velocity. For a fast hat roll, hold Note Repeat and choose 1/16 at the bottom of the screen. The Arp window, where Note Repeat also lives, has its own Swing field too, from 50% to 75%.
Step 5. Set the swing on the MPC
This is the question most guides skip, so here is how it works. Roger Linn, who designed the MPC60’s timing, told Attack Magazine that his swing is simple: “I merely delay the second 16th note within each 8th note.” That has one big consequence.
At a 1/16 grid, only even-numbered steps move. Steps 1, 3, 5 and so on never change. So if you set Swing to 62% on Pattern 1 above, you hear nothing at all, because every hit sits on an odd step. That is why a producer can add swing and think the MPC is broken. Pattern 2 is different: the kick on step 8 slides later and the whole bar leans back.
How to set swing, button by button
- Open the Timing Correct window: tap the TC field in Main Mode, or press the TC button on the Live II, One, Key 61 and Key 37. In Grid View, tap the clock icon.
- Set Time Division to 1/16.
- Set Swing (50% to 75%).
- Tap Do It to apply it. Shift + TC turns global timing correct on or off.
Tip: map Swing to a Q-Link knob. The preference Q-Link Swing Control Applies TC Settings on Release applies each new value as soon as you let go of the knob, so you can test settings by ear while the beat plays, without reopening the window.
MPC swing settings: what each percentage does
Here is how late the even steps land at three tempos. It is why the same number feels different on different beats: at 80 BPM, 58% moves a note 30 ms; at 100 BPM, only 24 ms.
| Swing | 80 BPM | 90 BPM | 100 BPM | What it does |
|---|---|---|---|---|
| 50% | 0 ms | 0 ms | 0 ms | Straight: every step exactly on the grid. Stiff, but the right place to write the pattern |
| 54% | 15 ms | 13.3 ms | 12 ms | Loosens the feel without sounding like swing. Linn’s own example of a subtle setting |
| 58% | 30 ms | 26.7 ms | 24 ms | A clear lean with the kick and the ghost notes still tight |
| 62% | 45 ms | 40 ms | 36 ms | Audible bounce. Linn says that at 90 BPM it feels looser than 66% |
| 66% | 60 ms | 53.3 ms | 48 ms | About a perfect triplet: a real shuffle |
| 71% | 78.8 ms | 70 ms | 63 ms | Heavy. Check it against your sample before you commit |
| 75% | 93.8 ms | 83.3 ms | 75 ms | The MPC’s maximum. An effect more than a groove |
Linn calls the range from about 50% to 70% full of small, useful settings, and he’s right: 54, 58, 62, 66 and 71 are just the classic steps from old machines (Attack lists the same numbers for Logic’s 16A–16F, modelled on vintage drum machines). On MPC 3 you can set anything in between.
What about a 1/8 grid?
The same logic moves up a level: the second 8th in each beat gets delayed instead (steps 3, 7, 11, 15), and the same percentage moves it twice as far. RouteNote’s guide suggests 57–64% for this Dilla-style lean and warns that too much starts to sound like a waltz. It also describes the two poles well: DJ Premier using subtle swing for bounce, J Dilla using heavier swing and playing without quantizing. Hear the second approach on Donuts.
Beyond swing: push notes by hand
Swing moves every even step by the same amount. For a single note, open Grid View, select it, tap Nudge and hold Don’t Snap: each turn moves it by four ticks, free of the grid. A snare a touch behind the beat is a classic move. In the Timing Correct window, Strength quantizes only part of the way, so live playing keeps some of its looseness. The Humanize function randomizes timing and velocity, but it is random: placing a few notes on purpose usually sounds better.

Step 6. Shape and layer the drums
Make these moves in order, and A/B each one against the original. Most of the character should already be there from your samples.
- Tune. In Track Edit, adjust Semi and Fine on the snare until it sits with the sample. Tuning a snare down a little often adds weight.
- Layer. Each pad holds four sample layers (Track Edit › Samples). Put a quiet break under your one-shots, or a clean kick under a dusty one, on a separate pad if you want to control them apart. Trim the attacks so they start together.
- Grit. The Drum FX tab in Track Edit adds simple per-pad effects: Tube Drive, Soft Clipper, Bit Crush, Decimator, Low Pass, High Pass and Bass Enhancer. A low-pass on the hats takes off the digital shine.
- Bit depth. AIR Lo-Fi lowers Bit Depth (1 to 16) and Sample Rate, and it has a Mix control. Blend it in on the drum track or a send instead of crushing everything at 100%.
- Vintage Mode. Preferences › General has a Vintage Mode setting that applies the sonic character of machines like the MPC3000 or MPC60 to the audio output. It changes the whole output, so try it at the end, not while you choose sounds.
Where to buyAkai MPC One G2
Step 7. Chop the sample
With the drums down, bring in the sample. The full method is in our guide on how to chop samples on an MPC. In short: Menu › Sample Edit › Chop, pick Manual for soul and jazz, then Shift + Convert › New drum track using slices.
Three details matter for this style:
- Mute group. In Track Edit, put the chops in one Mute Group so each pad cuts the last one. That is the choppy, stop-start feel.
- Filter the lows. Use a high-pass on the chops so the sample’s bass does not fight your kick. This is the most common reason a beat sounds muddy.
- Swing the chops too. Apply the same Timing Correct settings to the sample track, or the melody will sit straight on top of swung drums. Often the better option is to play the chops in by hand and quantize lightly with Strength.
For how a single record can be flipped many ways, read our breakdown of the Bob James “Nautilus” sample.

Step 8. Add the bass
You have two ways, and both are classic:
- From the sample. Find a low note in the record, chop it, and use a low-pass filter on the pad until only the bottom is left. It already fits the record’s tone because it came from there.
- On a keygroup track. Press the pad with your bass sound, go to Track Edit and tap the keyboard+ icon. The MPC turns it into a Keygroup track and the pads switch to Pad Perform, so you can play it melodically. Set Poly to Mono so notes cut each other.
Keep it simple. Let the bass follow the kick: same steps, or the root note just after it, with short phrases and plenty of silence. Boom bap leaves room for a rapper, and KRS-One’s own description of the aim was the fewest instruments for the most rhythm. Check it on real speakers or decent headphones, because this is where small laptop speakers lie; see our best studio monitors and best headphones for music production guides.
Step 9. Arrange and export
A loop is not yet a beat. Open Menu › Arrange, and use the pencil icon’s Double length button to go from 2 bars to 4 and then 8. From there:
- Change the last bar of each 4 or 8 bars: Pattern 4 above, a dropped kick, or a chop that appears only there.
- Build separate sequences: full beat, no drums, no sample. Hook and verse can differ by a single element.
- Test combinations in Track Mute Mode. Set its Time Division to 1 Bar and the mutes land exactly on the next bar, so you can arrange by feel while it plays.
- Chain the sequences in Song Mode (Menu › Song) and tap Export to render it.
Before you release anything, write down what you sampled. A released beat needs the sample cleared, and that includes drum breaks. Our vinyl sampling guide explains master and composition rights.
Seven boom bap mistakes to avoid
- Adding swing with every note on odd steps. Nothing changes, and you start turning it up. Move a kick or ghost note first.
- Hats too loud. If you notice the hats first, they are too loud.
- Too many drum hits. The space between kick and snare is the style.
- A straight sample on swung drums, or the other way around.
- Leaving the sample’s bass in and fighting your kick.
- Crushing everything at the end to make it sound old. Character comes from the sources, then small touches.
- Copying a percentage from a video. That number was right for that tempo, those hats and that sample.
How to make a beat on each MPC
| Machine | Does this guide apply? | Good to know |
|---|---|---|
| MPC Live III · MPC XL · MPC One G2 · MPC Key 37 G2 | Yes: same MPC 3 screens | The Live III and XL have phono inputs for sampling a turntable directly |
| MPC Live II · MPC One · MPC X · Key 61 | Yes: same MPC 3 screens | The Live II, One, Key 61 and Key 37 have a TC button |
| MPC Sample | The ideas yes, the screens no | Its own simpler system. See the Akai user guide |
| Roland SP-404MKII | The ideas yes, the screens no | Set QTZ to SHUFFLE 16 and SHFL RATE +10 to +16, Roland’s suggested range |
Which one suits you? Our best Akai MPC guide and the MPC One G2 vs MPC Live III comparison cover the current range. For the smaller machines, see the MPC Sample review and MPC Sample vs SP-404 MKII vs EP-133. Note that the SP-404MKII’s shuffle scale runs from −50 to +50, so its numbers are not MPC percentages.
Where to buyAkai MPC Sample

Royalty-free samplesSpliceNeed drums and samples to start with? Royalty-free boom bap one-shots, drum loops and soul samples, licensed for commercial releases.
How to make boom bap beats: FAQ
How do you make a boom bap beat on an MPC?
Set the tempo to around 90 BPM, put the snare on beats 2 and 4, build a kick pattern around beat 1, add hats with varied velocity, then open Timing Correct and set Time Division 1/16 with Swing between 54% and 62%. Chop a sample over the drums, add a bass line that follows the kick, and arrange it in Arrange Mode or Song Mode.
What is the best BPM for boom bap?
Most boom bap sits between about 80 and 105 BPM, and the tempos most tutorials reach for are in the 85 to 95 range. Start at 90 and change it to suit the sample. A slow, heavy loop can go lower; a fast, bright one can go higher.
What swing setting should I use for boom bap on an MPC?
Start at 54% to 58% with a 1/16 grid, then try 60% to 62% if you want more bounce. 50% is straight and 66% is about a perfect triplet. There is no correct number: it depends on the tempo, the hats and the sample, so set it while the beat is playing.
Why does the MPC swing not change my beat?
At a 1/16 grid, swing only delays the even-numbered 16th steps (2, 4, 6, 8 and so on). If your kick, snare and eighth hats all sit on odd steps, nothing moves and that is correct. Add a kick or a ghost note on an even step, or play 16th hats, and you will hear it. Also remember to tap Do It in the Timing Correct window to apply it.
What are the MPC swing percentages?
On MPC 3 the Swing field runs from 50% to 75%. Producers tend to talk about 54%, 58%, 62%, 66% and 71% because those are the classic steps from older drum machines, but you are not limited to them.
What is a boom bap drum pattern?
Kick on the downbeat, snare on beats 2 and 4, and hats in eighths or sixteenths between them. The name imitates that sound: boom for the kick, bap for the snare. The character comes from extra kicks placed just off the beat, ghost notes and swing.
How do you make boom bap drums hit hard?
Start with a good kick and snare, since no plugin fixes a weak sample. Tune the snare to the track, keep the hats quieter than you think, leave space around the kick, and add saturation in small amounts. Layer a break underneath the one-shots for texture instead of turning everything up.
How do you make a boom bap bass line?
Either filter a low note out of your sample with a low-pass filter or put a bass sample on a keygroup track and play it on the pads. Set Poly to Mono so notes cut each other, and let the bass follow the kick with short, simple phrases.
How do you make a beat on the MPC One, Key 37 or Live 2?
The same way as on the Live III. They all run MPC 3 software, so the Timing Correct window, Track Edit, Drum FX, Sample Edit and Song Mode are the same screens. The main difference is shortcut buttons: the Live II, One, Key 37 and Key 61 have a TC button, for example.
How do you make a beat on the MPC Sample?
The MPC Sample runs its own simpler system, so the screens in this guide do not apply button for button. The musical ideas do: same tempo, same drum patterns, same chops. See our MPC Sample review and the Akai user guide for its controls.
Do you need to clear samples and breaks in boom bap?
If you release the beat commercially, yes: a sampled record has rights in both the master and the composition, and that includes drum breaks. Royalty-free sample libraries avoid the problem. For practice and private beats it is not an issue.
Sources
- Akai Professional: MPC Standalone OS user guide v3.4 (Timing Correct, Step Sequencer, Note Repeat, 16 Levels, Track Edit, Drum FX, AIR Lo-Fi, Vintage Mode, Keygroup Tracks, Arrange, Song Mode)
- Attack Magazine: Roger Linn on swing, groove and the magic of the MPC’s timing
- Attack Magazine: swing in DAWs and drum machines (the 50–71% steps)
- RouteNote: how to make 90s hip hop boom bap drums (tempo range, 8th-note swing)
- Wikipedia: Boom bap (T La Rock, DJ Premier, KRS-One)
- Gearnews: how to sound like DJ Premier (S950 and MPC60 workflow)
- Stereogum: Breaks With Tradition, “Impeach the President”
- Roland: SP-404MKII reference manual, creating a new pattern (QTZ, SHFL RATE)
GUIO Records is not affiliated with Akai Professional or Roland. Prices and products change; the buttons show the current price on Amazon.