This article contains affiliate links. If you buy through them, GUIO Records may earn a small commission at no extra cost to you. As an Amazon Associate I earn from qualifying purchases.
How to Record Rap Vocals at Home: Step-by-Step Guide (2026)
You do not need a big studio to record rap vocals that sound like records. You need a quiet spot, a sensible signal chain and a few habits that engineers repeat in every session. Here is the whole process in 10 steps, from choosing the room to backing up the session.
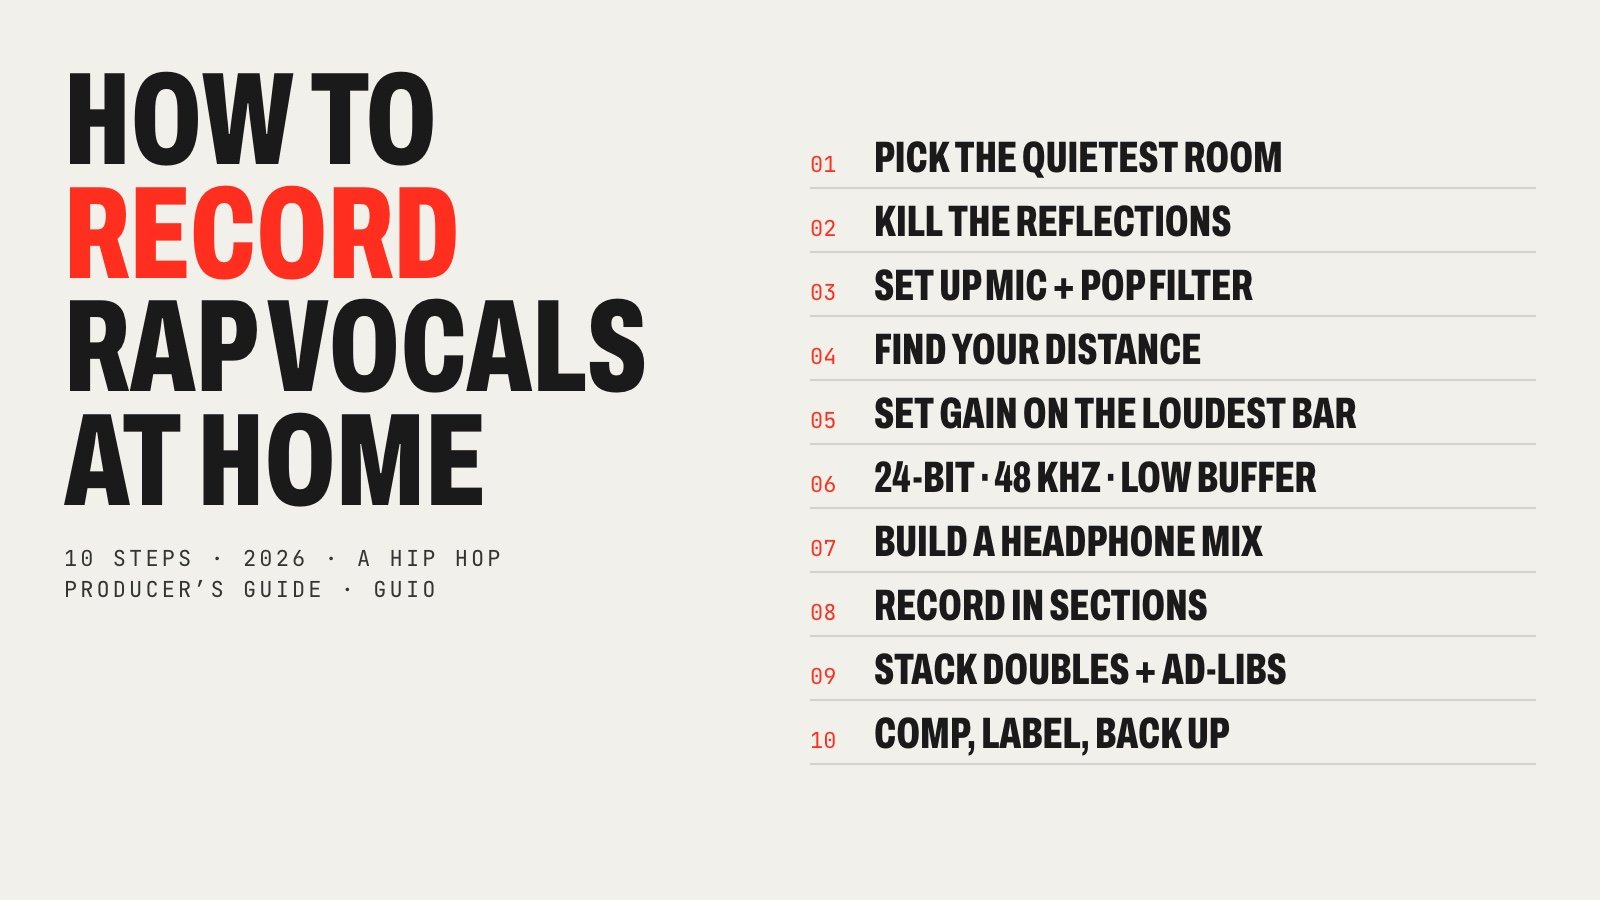
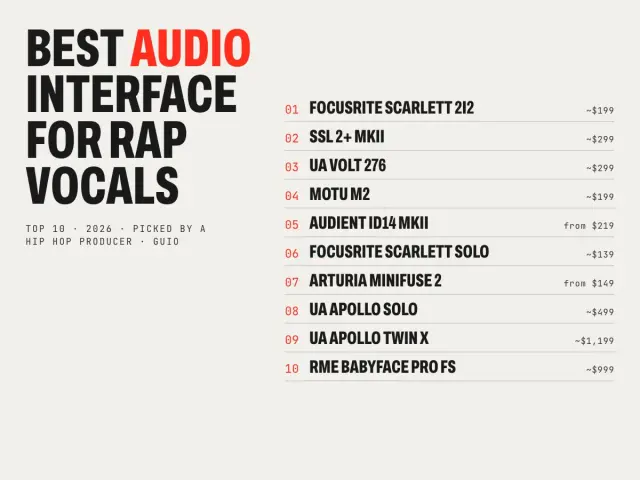
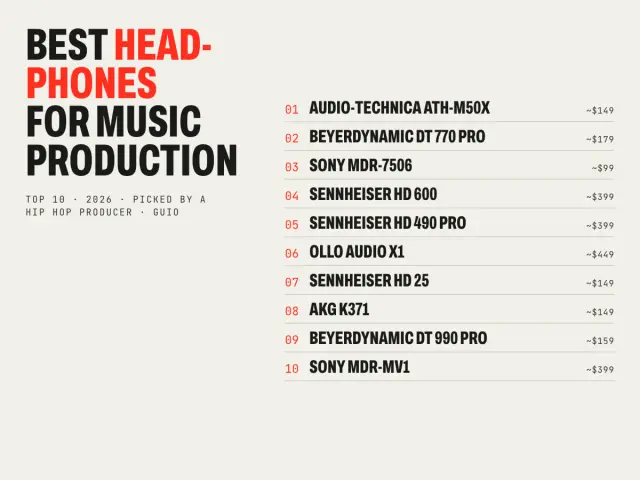
Most bad home vocals do not come from cheap gear. They come from a room that echoes, levels set too hot, delay in the headphones and sessions nobody can find later. All four are free to fix. This guide walks you through each step and links to our gear guides when a purchase actually helps: the best microphones for rap vocals, the best audio interfaces for vocals and the best headphones for music production.
A note on how this guide was made: I am a hip hop producer, not a rapper, and I do not record vocals in my own studio. What follows gathers manufacturer guidance (Shure, Focusrite, Sweetwater) and the advice of working engineers, credited at the end, together with what I know from the beat side about how vocals and beats fit together.
What you need before you start
| What you need | Budget pick | Why it matters |
|---|---|---|
| Microphone | Shure SM7B or SM7dB · Audio-Technica AT2020 | Dynamic mics reject more of an untreated room |
| Audio interface | Focusrite Scarlett 2i2 4th Gen | Clean gain and zero-latency monitoring |
| Closed-back headphones | Audio-Technica ATH-M50x · Beyerdynamic DT 770 Pro | Keep the beat out of the mic |
| Pop filter | Any double-mesh pop filter | Stops the “p” and “b” blasts |
| Mic stand | Sturdy boom stand or desk arm | Same position for every take |
| Room help | Reflection filter, blankets, a closet of clothes | Less echo, cleaner vocals |
| DAW | Any: Pro Tools, Logic, FL Studio, Ableton, Studio One, Reaper | All of them do the job |
If you are still building your setup, start with the mic guide. If you already have a mic, check that your interface has enough gain for it in the interface guide.
Where to buyShure SM7B
Step 1. Pick the quietest room
Walk around your place and listen. The best room is the one with the least outside noise (traffic, neighbors, a street) and the most soft things in it: a bedroom with a bed, curtains, a rug and a closet beats an empty living room every time.
- Turn off fans, AC, heaters and the fridge nearby while you record. Mics hear constant hum much more than you do.
- Move your computer as far from the mic as your cables allow, or point the back of the mic at it.
- Record at the same time of day when you can. Neighbors and traffic change a lot between morning and night.
Step 2. Kill the reflections
What makes home vocals sound “homemade” is usually not noise, it is reflections: your voice bouncing off hard walls and back into the mic a few milliseconds later. You can hear it as a small, boxy echo, and you cannot remove it later with a plugin.
- Face soft stuff, not a wall. Rapping into an open closet full of clothes, or with your back to one, is an old trick that works.
- Treat what is behind the mic and behind you first. That is where most of the bounce comes from.
- Moving blankets or duvets hung on stands or a door are a cheap, effective fix. A reflection filter behind the mic helps too, but works best with something soft behind your head.
- Avoid the center of the room and the corners. Try a spot slightly off-center, record ten seconds in a few places and keep the one that sounds driest.
A small empty closet can sound boxy, so a closet is not always the answer. The video below shows why, and what to do instead.

Where to buyMicrophone reflection filter
Step 3. Set up the mic and pop filter
Put the mic on a solid stand at mouth height, so you can stand straight while you rap. Standing gives you more breath and energy than sitting. Connect it to your interface with an XLR cable, and if it is a condenser mic, turn on 48V phantom power on the interface.
Add a pop filter a few inches in front of the mic. It stops the blasts of air from “p” and “b” sounds (plosives), which rap has plenty of. Dynamic mics like the SM7B have a foam windscreen, but many engineers still use a pop filter as a physical reminder of where to stand.
Where to buyPop filter for microphone
Step 4. Find your distance
Distance changes your sound more than most plugins. The closer you are, the more bass you get (the proximity effect) and the less room the mic hears. Further away, the vocal is thinner and the room gets louder.
- Dynamic mic (SM7B, SM7dB, Procaster): Shure’s user guide recommends speaking 1 to 6 inches away. For rap, 2 to 4 inches is a good start.
- Condenser mic (AT2020, NT1): start around 6 to 8 inches, with the pop filter in between.
- Mark the spot. A piece of tape on the floor, or a fist’s distance to the pop filter, keeps every take consistent. Changing distance between takes makes comping much harder.
- Lean back slightly on the loudest lines and come closer on quiet, low parts.
Step 5. Set gain on your loudest bar
This is where most beginners ruin takes. Set the preamp gain on your interface while rapping the loudest part of the song, the hook or the line where you yell, as loud as you will in the real take.
- Aim for peaks around −10 dBFS on your DAW meter. Your average level will sit well below that, and that is fine.
- Never touch 0 dBFS. Digital clipping is permanent distortion.
- Quiet dynamic mics need a lot of gain: Shure says the SM7B needs about 60 dB for normal speech close to the mic. If your interface runs out, an inline booster like a Cloudlifter or the SM7dB with its built-in preamp fixes it.
- Features like Focusrite’s Clip Safe or Auto Gain help, but still check by ear.
Where to buyFocusrite Scarlett 2i2 4th Gen
Step 6. Set up your DAW: 24-bit, sample rate and buffer
- Bit depth: 24-bit. It gives you so much headroom that there is no reason to record loud. (Many DAWs also offer 32-bit float.)
- Sample rate: 44.1 or 48 kHz. Match the beat’s session. 48 kHz is the standard for video, useful if the song will have a music video.
- Buffer: 64 or 128 samples while tracking. A small buffer means less delay between your voice and your headphones. Sweetwater notes that 128 samples is about 3 milliseconds at 44.1 kHz, which most people do not notice. If you hear clicks or dropouts, go up one step.
- Direct monitoring. Most interfaces can send your mic straight to your headphones without passing through the computer, so the buffer does not affect what you hear. Focusrite’s Direct Monitor works this way.
- Turn off heavy plugins on the master bus while recording. Limiters and some EQs add delay.
- Import the beat as a WAV, not an MP3, and set the session tempo to the beat’s BPM so you can loop and punch in by bars.
Making the beat on an MPC? You can record into it directly, but most artists bounce the beat as stems or a stereo WAV into a DAW for the vocals. If you are choosing a machine, see our guide to the best Akai MPC.
Step 7. Build a headphone mix you can perform to
A rapper who can hear themselves clearly performs better. Use closed-back headphones so the beat does not bleed into the mic, then shape the mix:
- Beat a little lower than you think, voice clearly on top, so you hear your pitch, breath and timing.
- A touch of reverb in the headphones only (not recorded) can make you more comfortable.
- If you rap ahead of or behind the beat, try turning the kick and snare up in your headphone mix.
- Do not let the headphones play too loud; you will push your voice and tire faster.
Where to buyAudio-Technica ATH-M50x
Step 8. Record in sections, not the whole song
Few rappers deliver a perfect three-minute take. Record section by section: one verse, or four to eight bars at a time, then the hook.
- Do three to five takes per section, each on a new playlist, lane or track depending on your DAW.
- Use punch-ins to fix one line without redoing the verse, starting a bar early so you catch the flow.
- Warm up with a full run-through first. The first take is often the stiffest, and sometimes the third is the one.
- Keep water nearby and avoid dairy and cold drinks right before a session.
- Record a “safety” pass of the whole verse once you have the energy. Sometimes it has the feel the sections lack.
Step 9. Stack doubles and ad-libs
The “big” sound of rap records usually comes from layers, not plugins. A common stack:
- Main vocal: the comped lead.
- Doubles: a second performance of the hook and of key words at the end of lines, tight to the main take. They make lines hit harder.
- Ad-libs: the shouts, laughs and echo words, on their own track, so the mixer can pan them and add effects.
- Hook stack: two or three takes of the hook, sometimes one an octave lower or whispered.
Keep each layer on its own labeled track: “Lead V1”, “Dbl V1”, “Adlibs Hook”. It saves hours later.

Step 10. Comp, label and back up
- Comp: listen to each take of a section and build one track with the best line, or even the best word, from each. Most DAWs have a comping tool that does this in a few clicks.
- Clean up gently: remove clicks and big breaths between lines, but leave some breaths in, or the vocal sounds robotic.
- Label everything, including the BPM and key of the beat in the session name.
- Export clean files (no effects, 24-bit WAV, starting at bar 1) if someone else will mix.
- Back up in two places: an external drive and the cloud. A lost session cannot be re-recorded with the same feel.
Five mistakes that ruin home rap vocals
- Recording too hot and clipping the loudest lines.
- Open-back headphones or speakers on while recording, so the beat bleeds into the vocal.
- A bare room with hard walls behind the mic.
- Changing mic distance between takes, so the comp sounds like three different rooms.
- Printing effects (heavy Auto-Tune, reverb, compression) you cannot undo. Monitor through them if you like, but record clean.
Videos: see it done

Where to go from here
Once you have a clean, well-recorded vocal, the mix gets much easier: less EQ to fight the room, less compression to fix uneven levels and no noise to remove. If your recordings still sound off after these 10 steps, the next upgrade is usually room treatment, then the mic, then the interface, in that order.
And the most important part comes before any of it: a beat that leaves space for your voice. That is the side of the record I work on every day.
Recording rap vocals at home: FAQ
What do I need to record rap vocals at home?
A microphone, an audio interface, closed-back headphones, a pop filter, a mic stand, a computer with a DAW and a quiet spot with soft surfaces around you. A Shure SM7B or AT2020 with a Focusrite Scarlett 2i2 is a common starting setup.
How far should I be from the mic when I rap?
With a dynamic mic like the Shure SM7B, Shure recommends 1 to 6 inches; 2 to 4 inches is a good start for rap. With a condenser mic, start around 6 to 8 inches. Move back slightly on loud lines and keep the distance consistent between takes.
What level should my vocals be when recording?
Set the gain while you rap your loudest line and aim for peaks around −10 dBFS, with the average level well below that. At 24-bit there is plenty of headroom, so there is no need to record hot, and clipping at 0 dBFS ruins a take.
What buffer size should I use to record vocals?
Use the lowest buffer your computer handles without clicks while tracking, usually 64 or 128 samples. Sweetwater notes that 128 samples is about 3 milliseconds at 44.1 kHz, which most people do not notice. Raise it again when you mix.
Is it OK to record vocals in a closet?
A closet full of clothes absorbs a lot of reflections and can sound good, but small empty closets can sound boxy. Try it, compare with recording in front of the open closet or near a bed, and keep whichever sounds less like a room.
Should I use a dynamic or condenser mic in an untreated room?
A dynamic mic like the SM7B, SM7dB or Procaster is usually the safer choice in an untreated room because it picks up less of the space around you. Condensers capture more detail, and more room. See our microphone guide for picks.
How many takes should I record?
Three to five takes per section is a good rule. It gives you enough options to build a strong comp without spending hours listening back.
Do I need Auto-Tune when recording rap?
No. Some rappers like to hear a light pitch-correction effect while recording because it shapes how they perform, but record the vocal clean and add the effect as a plugin so you can change it later.
Sources
- Shure: SM7B user guide (mic distance and proximity effect)
- Shure: SM7B output level and preamp gain
- B&H Explora: get the most out of your Shure SM7B
- Sweetwater: understanding latency
- Sweetwater: managing latency
- Focusrite: buffer size and latency
- Focusrite: Scarlett 2i2 4th Gen (Auto Gain and Clip Safe)
GUIO Records is not affiliated with any of the brands mentioned. Prices and products change; the buttons show the current price on Amazon.